My students last year blew me away with their teamwork and responsibility during our cooking activities! We grow a Three Sisters Garden as part of our curriculum, and after we had harvested the garden, it was time to use all of that great produce. The kids brainstormed different foods they could make using our pumpkins, and voted on which recipe to make.
Click here to download the recipe we used.
Here's the step-by-step of how we made pumpkin muffins from scratch -- in the classroom!
1. Cut each pumpkin in half. Use your hands or a spoon to scoop out the seeds and stringy bits.
2. Separate the seeds and rinse them. Set them aside so you can roast them later.
3. Once your pumpkin is nice and clean, place it cut-side down on a foil-lined baking sheet. Roast at 375 degrees Fahrenheit for 1 1/2 hours, or until tender.
4. Allow the pumpkin to cool, then scoop out the flesh and discard the rind.
***At this point, you can puree it in a food processor or blender to make it smoother. We chose to keep ours chunky.***
5. Gather your ingredients! I set up one table in the classroom for ingredients. I taped an index card with the name of the ingredient and the quantity needed for the recipe down to mark where on the table each item belonged. I also placed the appropriate measuring cups and spoons next to each ingredient.
7. Start cooking!
 |
| One student marks off on the recipe as the group completes each step. |
 |
| An adult helps crack eggs into a small bowl before they are added to the batter. |
 |
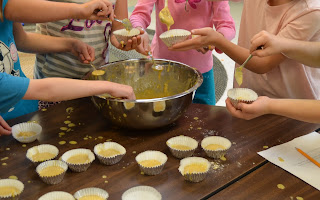
| Because we were making a very large quantity of muffins (120+), we used Reynolds baking cups that could stand on their own. |
 |
| We had to be careful not to spill the batter as we arranged our muffin cups on the baking sheet! |
8. Bake and enjoy!
We had prepared and cooked the pumpkins on one day, then mixed and baked the muffins the next day. We also shared the muffins with the third grade class, since they were the kids who had planted the pumpkins with me last spring at the end of their year in second grade.


No comments:
Post a Comment